

Since my last post not much has changed. I am still unemployed, but have been waiting to see what is going to happen with Covid before getting out and traveling much. After months at home, I am ready to hit the road again. I decided I can be alone and social distance in prettier, cooler scenery. The travel I have planned next will be different from my previous trips because I will be focusing more on remote places than tourist sites, like I normally do. In my preparation for longer term travel, I made some modifications to make the teardrop more comfortable and staying in it sustainable.
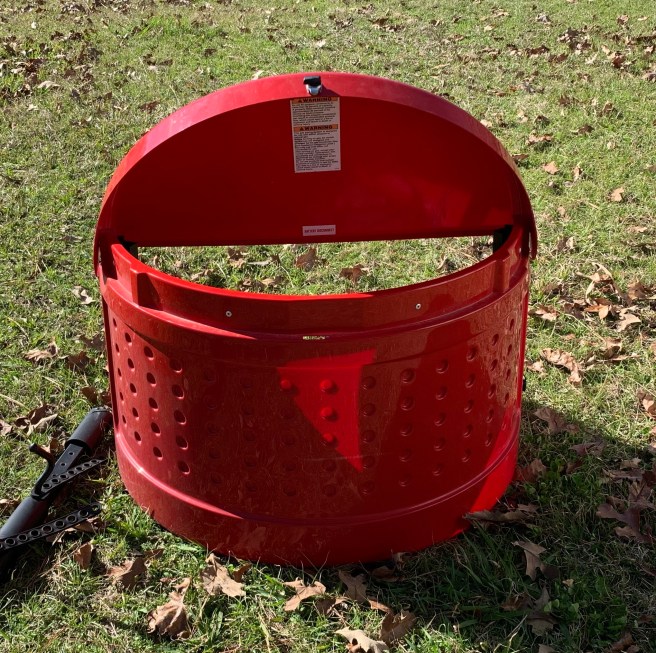
My first modification was actually from the winter but I never wrote about it because life happened and I had some issues that had to be worked out. The maiden voyage with it was not good, as I will talk about later, which discouraged me from working on it. Then came Covid and layoffs and I just now finalized it and got it all to work well.If you are familiar with the T@G you know the brightly colored, half moon compartment on the tongue that houses the propane tank and battery. While it works for it’s intended purpose, it doesn’t offer much storage, which is very valuable in a tiny camper.
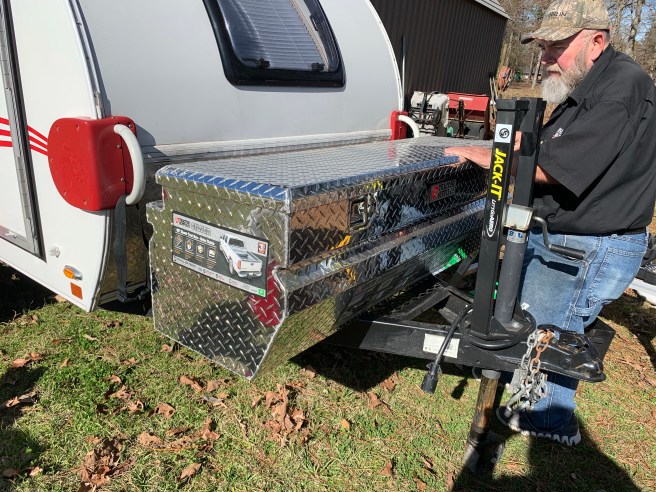
I have been looking at other possible options and trying to see what I could realistically do when I saw someone at the Fall Tiny Trailer Rally with a toolbox on the front of his. He was of course, gracious enough to give me a tour of what he did and told me he got his at Tractor Supply. I started doing some measuring and pricing and found one that would fit exactly. Over the Christmas holiday I took the teardrop up and my dad helped me make the conversion. They have enough space at their house and he has better tools, so it went much better than trying to do it by myself in my tiny garage in the city.
The first step was taking the old cover off, disconnecting the propane and battery and removing them. It’s actually a little bit tricky and I don’t have pictures because we got consumed with getting it all off and forgot to take them along the way. But if you do ever try to make this change let me give you run down. The metal bars that support the battery box and propane bottle are made as part of the cover, not the trailer tongue. Which means that in order to take it all off, you have to lift the battery and propane bottle out to access the bolts holding the cover to the tongue. We had originally tried to find a way to take the cover off to eliminate the need to lift them both so high since they are heavy, but had no luck.

Once everything was off, the toolbox fit on the tongue like it was made for it Since the battery disconnect and gas line connection were exposed with the setup of the original cover, we planned to leave them that way and run the lines into the toolbox.
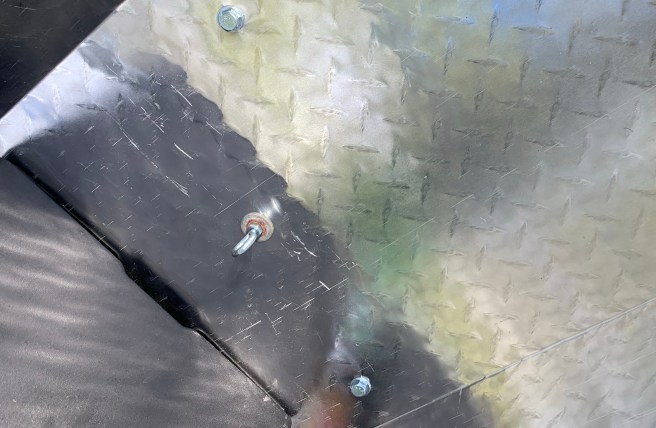
We bolted it in using the same pattern that was used for the original cover. We just used heavy duty machine bolts and washers and they were sturdy enough. There was some debate among people I had talked to about this mod who thought you would need a metal plate under the toolbox to support the ends hanging off. I did some simple calculations on force and weight and found that the strength of aluminum that is used to make these toolboxes is more than thick enough to support itself with any weight I would put it in it. (Note that there is a little dent you can see from the inside, but it was on clearance for super cheap, I’m assuming because of that dent, so I can live with it.)
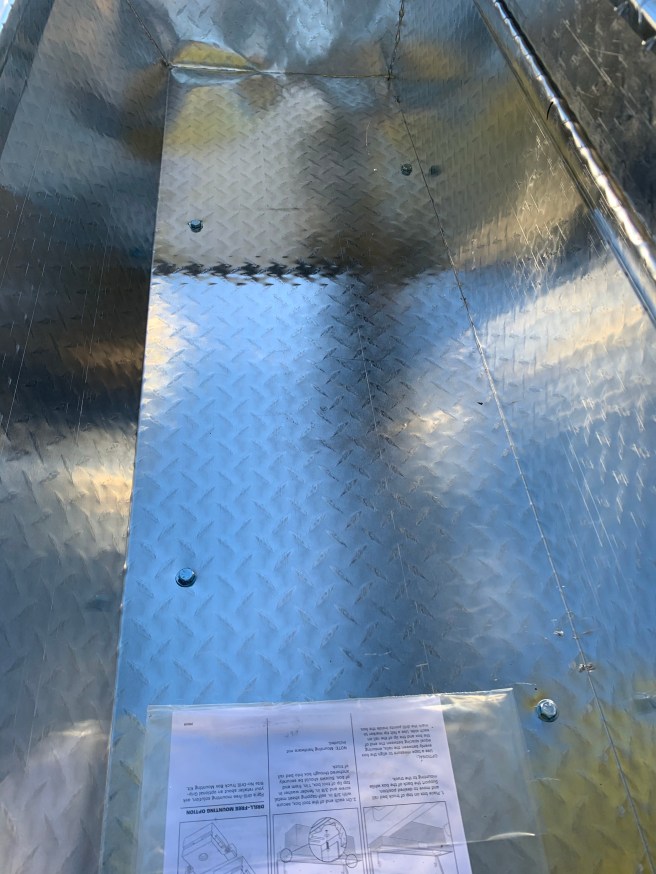
Even though we were not concerned about the weight, we still decided to mount the propane tank and battery, which will be the heaviest things in it, in the middle, as close to the original position as possible. We held them in place by adding eye bolts to the bottom of the tool box to use as mounting points for tie straps.

Since the toolbox will have the propane bottle and battery, of course it has to be vented. We did this 2 ways. The main vents we puton each end that are the largest. We did them in a series of holes cut with a hole saw because it would allow the metal to retain most of it’s structural integrity.
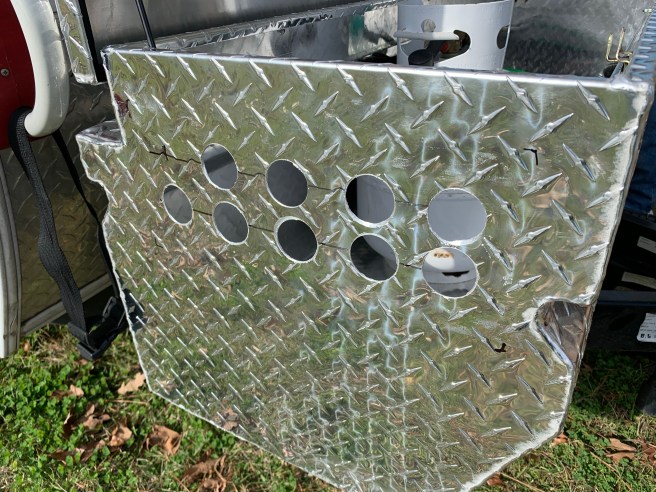
I had looked at putting vents covers, like you put on a AC vent in a house, but my dad pointed out the structural integrity issue with cutting one hole that large. My reason for using the vent cover was that the louvers should keep rain from blowing in as easy when it’s raining, while going down the road. We ended up going with a combination of our ideas and covering the holes with louvers and sealing them with silicon. It has worked out wonderfully. I have not had any rain get in it yet. If there is rain, we accounted for that too by putting 1/2″diameter holes in the bottom of the four corners.

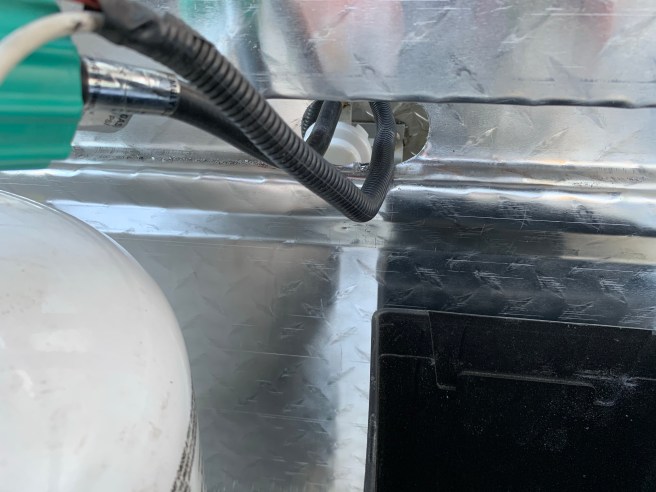
To connect the battery and propane we cut a slot at the back, right at the connection point to make sure the existing hose and cables reached. I can’t get a good angled picture to show it, but once we got them run, we split a piece of hose to line the hole opening to cover the sharp edge.

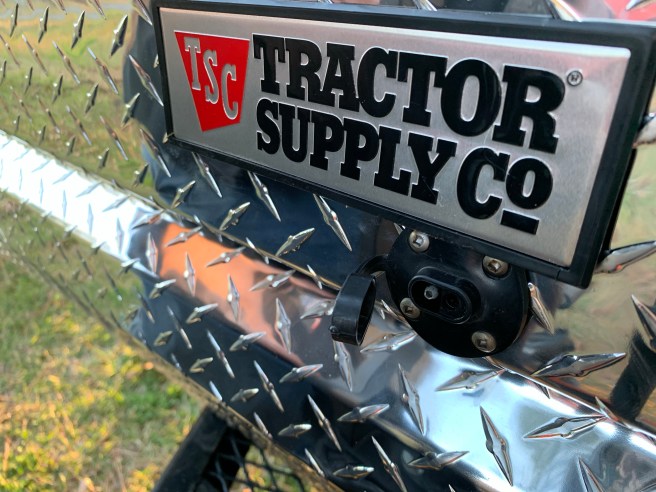
We made a change to the solar panel plug for the better. It was mounted to the original cover, but it’s just a plug, connected to the battery, on top of your regular battery cables. I was not a fan of where it was mounted because it was low on the driver’s side and limited the amount of maneuverability you had to move the panel around, on both side of the teardrop, to chase the sun. Since I try to park in shade I need as much reach from the solar panel cable as possible. So when we remounted it, we put it centered in the middle of the toolbox. This is just the best place to mount it, not trying to be an advertisement for Tractor Supply Company, but they were great on this toolbox, so I’m fine with that.
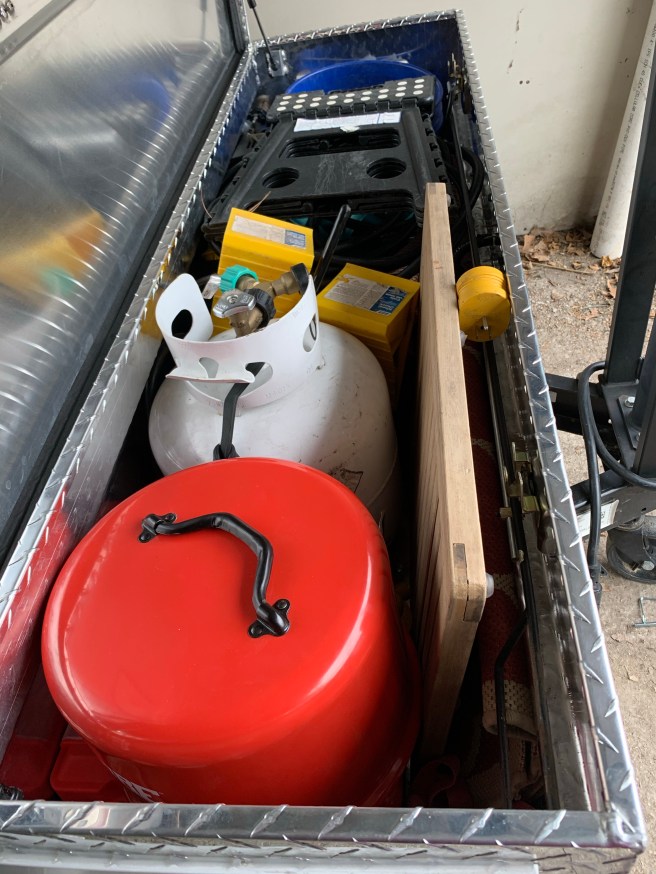
Once it was all set up, it gave a lot more storage space that I am going use for the “dirty” stuff I really don’t want to be putting in my vehicle. This includes the shower mat, water hoses, buckets, water heater, citronella candles, chock blocks and my propane fire pit. Since I had to take off the small red toolbox I had, I had to replace it with a toolkit that would fit in this larger toolbox. Since I’m only using it for tools now and not as a tackle box, collect-all of stuff I can use something much smaller.

The last piece of the puzzle to fix was the shower curtain rod. The way it and the new toolbox are made, it would not go between the toolbox and camper to mount the way I had it before. I took a couple trips with it in the truck and tried laying it across the toolbox, but both were really inconvenient. Since my goal when traveling is fast stops for setup and pack up, it was not working. My dad suggested finding a way to hang it from the bike rack. I tried using the hangers for the bike on the back and spent a lot of time in the heat before I realized it fits perfectly, just revered from how I was mounting it. Since it’s so lightweight the bungee cords will hold it at the top and the straps I was using to stabilize it to handles on the camper work by attaching them to the frame. It’s has worked great and does not hinder access to the toolbox at all.


The final design product and set up.

Now for the problems on this design I was working out and kept me from blogging about it. If you have a tiny trailer you already know your turning radius is already small and it will jackknife a lot easier than a larger trailer. I knew all this but had had the teardrop long enough that I was certain I could account for this. Turns out that what I could not account for was poor GPS directions when you have a bad signal. On my first trip with the toolbox I was driving in the dark, because it was January and it got dark early, was out in the middle of nowhere looking for a campground and my GOS told me too turn too soon. As I started to turn I realized it was telling me to turn into a grass turn row with a locked fence, in the dark, off a 2 lane road. Because I did not want to get stuck in the mud or have to back out blind I cut sharply back onto the highway, without thinking about the toolbox and heard a distinct “crunch.” If you are a follower of this blog you will know I had only had this Pathfinder 1-1/2 years and had bought it new after driving a Ford Escape over 10 years. So I was very upset and irritated with myself because I did it. Luckily the damage wasn’t too bad. I have since been able to pop the bumber out and all of the lights and sensors work correctly. It’s just a nice scape and dent in my new vehicle.

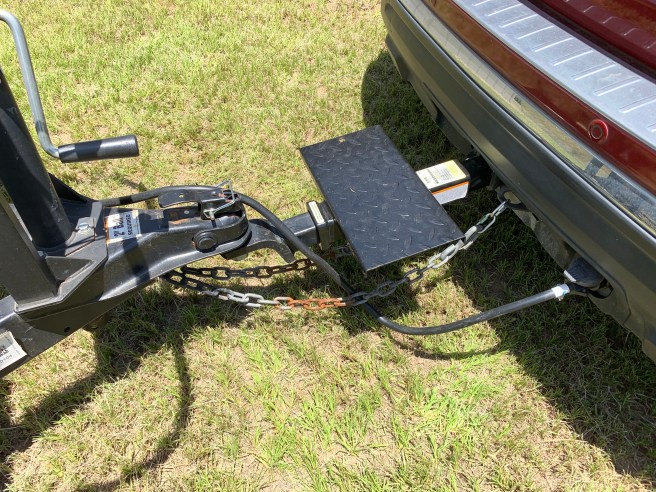
After I had some time to get over the damage and reason with myself that was not taking the toolbox and undoing all that work, I looked into other options. I found this hitch extender that serves two purposes. It gives me plenty of clearance for the teardrop and toolbox but also gives a step to help get the bike up on the bike rack. I have actually been standing on the hitch to that, which is not he most stable or safe place to stand and lift a heavy object.
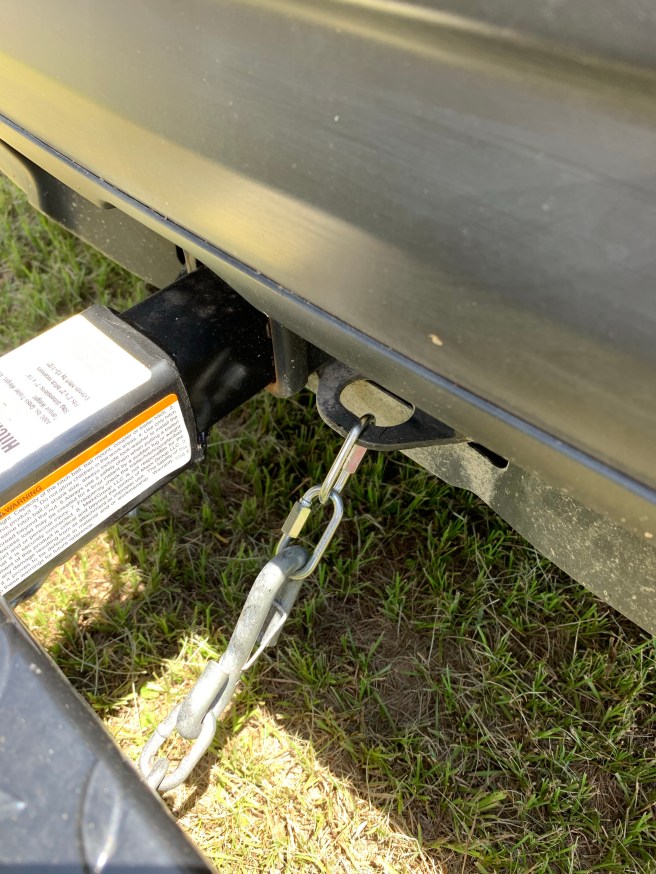
The last piece to work out was the chain. It was not quite long enough to reach the truck with the extender. It’s welded to the tongue so getting a longer one was not an option. I ended up finding these chain extenders on Amazon that worked perfectly. I ended up only needing two so they don’t hang down much and I can just leave them on the hitch.
It has taken 8 months to get it all worked out, but now that I have, I’m very happy with this modification. I think it’s going to make my travel much easier and keep my vehicle cleaner, especially for longer trips. Now to head out and test out that theory.
