

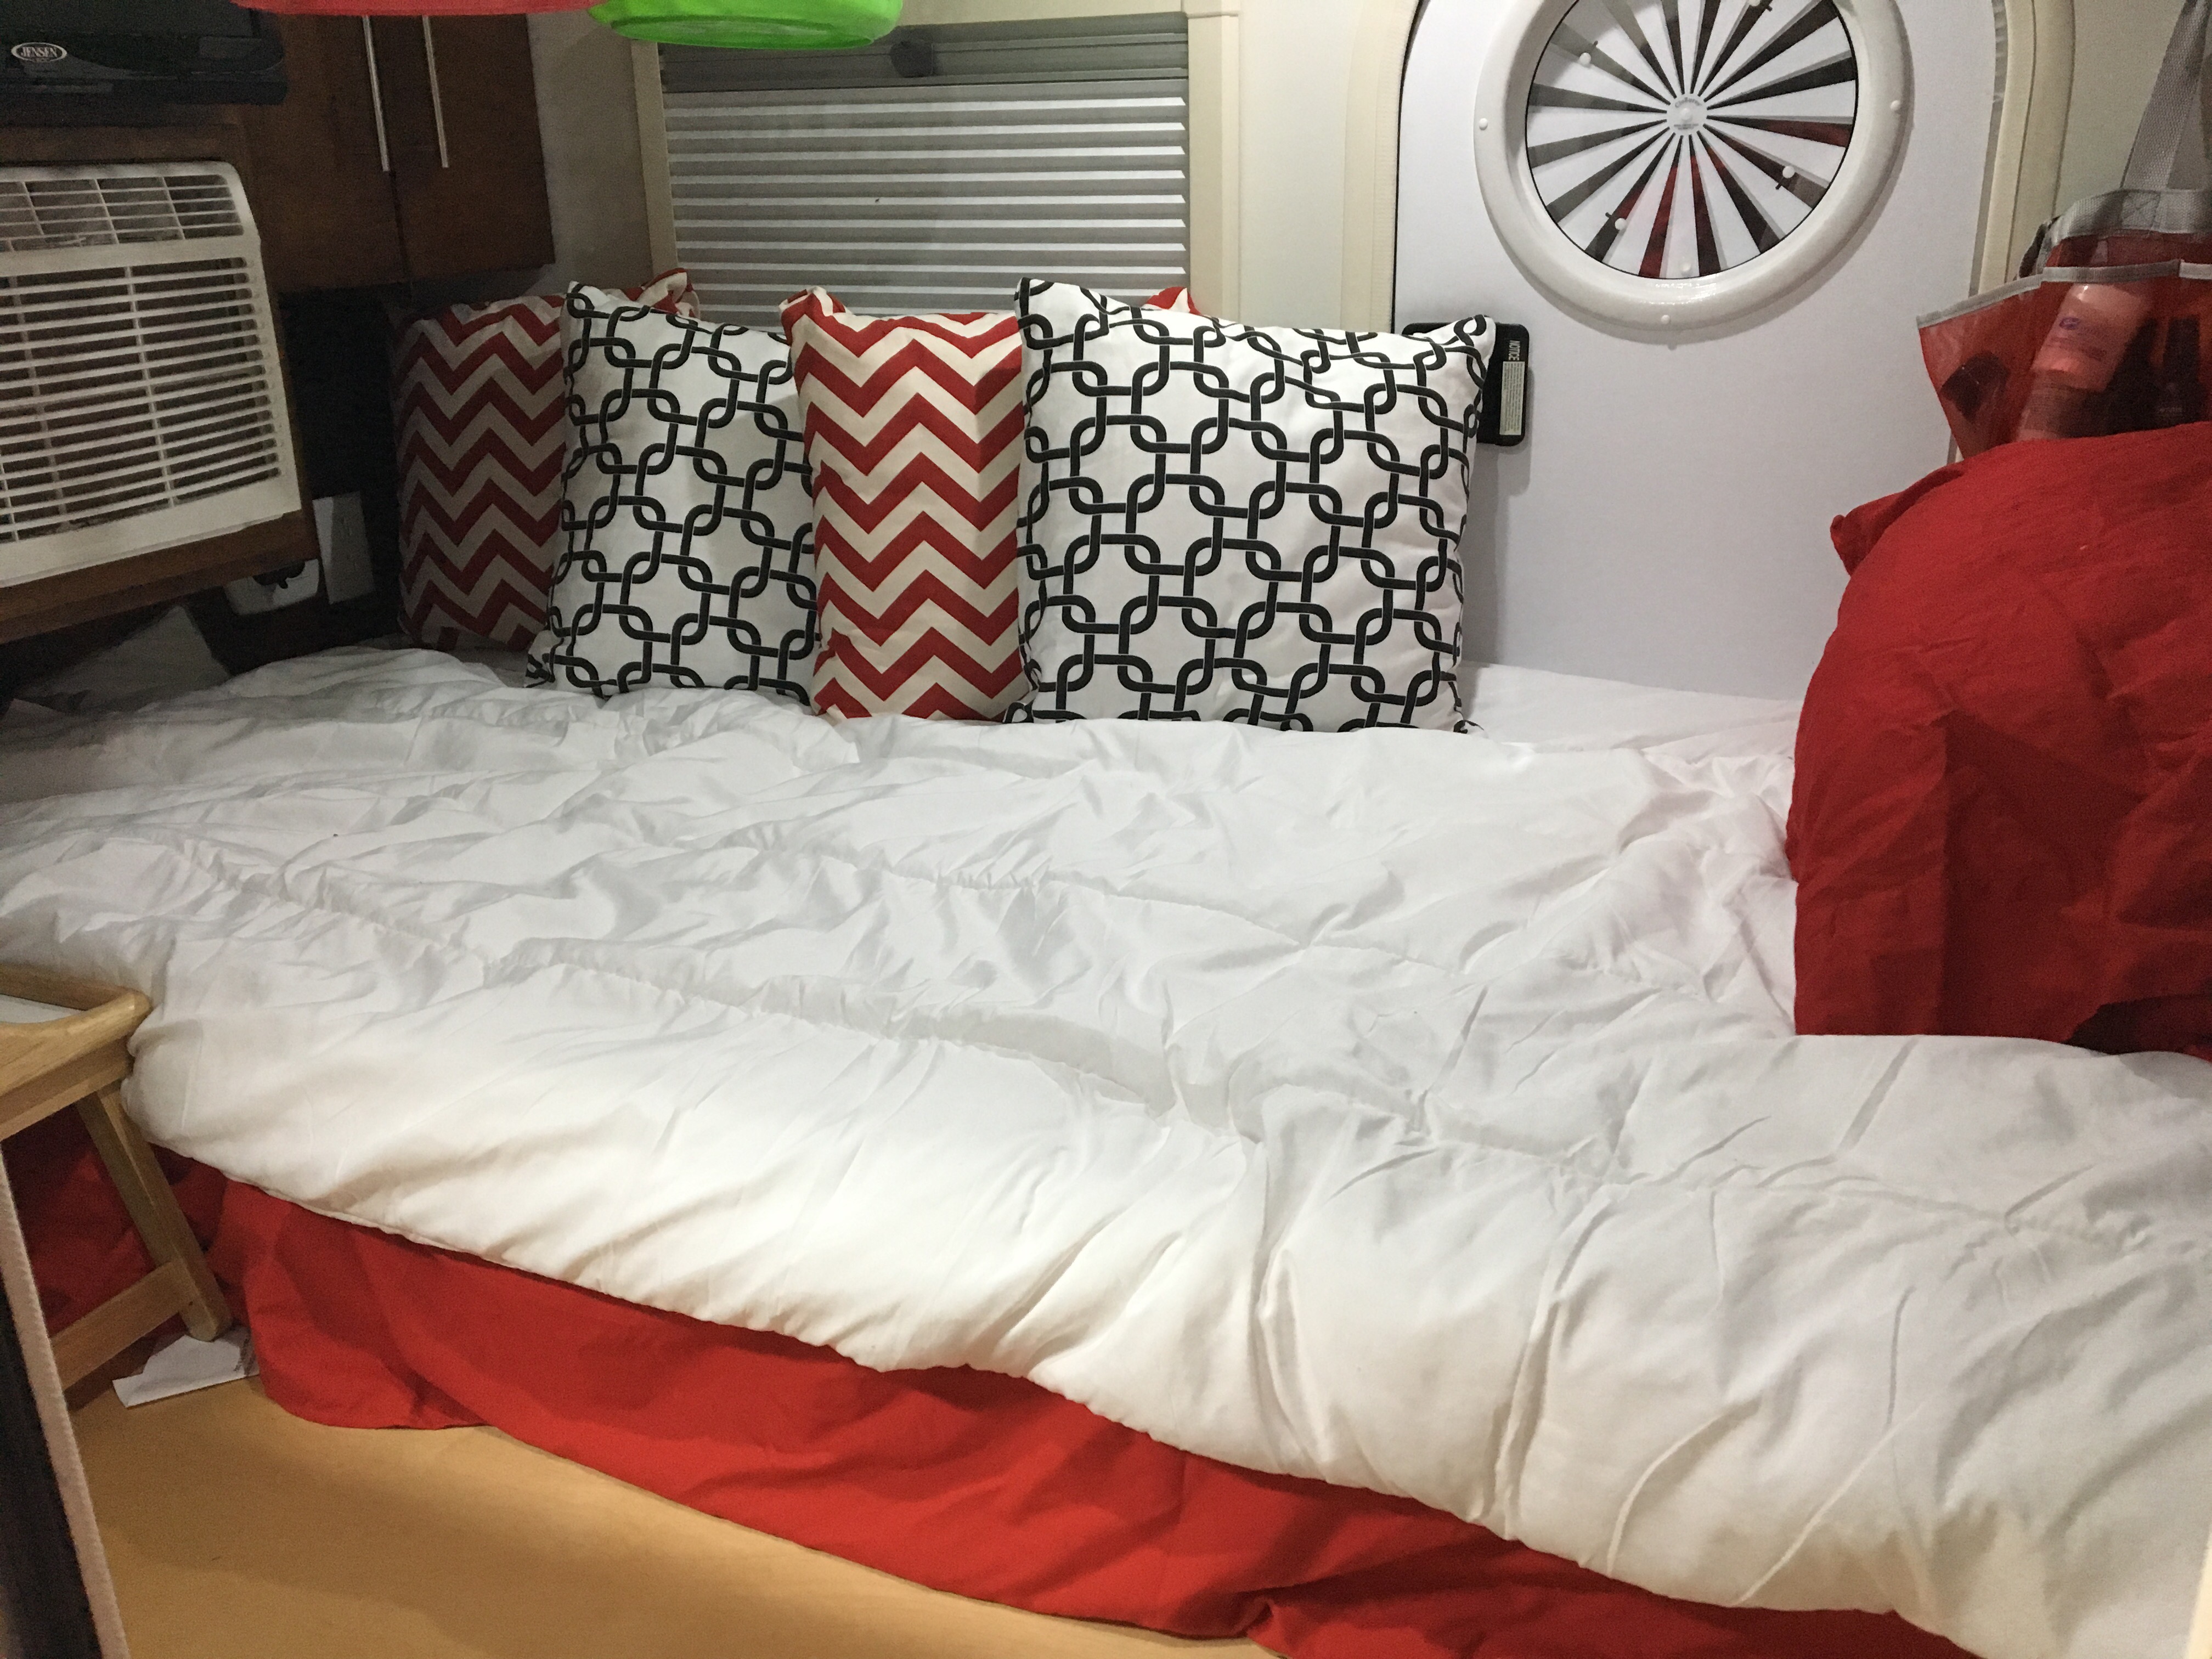
After my first trip out I had to go back to the drawing board to make the T@G function at its best and work for road trips. The top priority was the mattress. Since having a sacrum joint dysfunction in August 2015 I can’t sleep on a bad mattress without having issues. I started looking at mattress toppers but kept going back to idea of using a twin mattress for a daybed type setup. I didn’t need a full queen for just me and Bella since we had used maybe half the mattress the first time out.
Going to a twin would solve a few issues other than a better mattress. It would allow me a place to clean Bella off if it’s raining instead having to put her directly into the bed. It would also give me some space to put stuff with it all being on the bed. This includes the crate for supplies which was muddy after the first trip and had to go on the bed.
Although it seemed like the perfect idea I had an existential crisis considering it. I felt like making the decision to go with a twin mattress was like resigning myself to always camping alone. As my sister pointed out, it’s not like it can’t be changed in the future and I found an 8″ inner spring mattress with memory foam topper on Amazon for $100.
After getting the mattress I started on setup 2.0. I was leery of the mattress when it arrived rolled up in a tiny tube but it is very firm and comfortable. I also went ahead and bought a folding bed tray since trying to eat in bed using a book for a table the first trip out was less than ideal.


My next addition was more laundry baskets. I had bought one as an impulse buy but it turned out to be one of the best things I had. I had put my clothes in the cabinets and under the bed on the first trip but that was so much hassle to get to. I ended up throwing my p.j.s, socks and underwear in the one I had for easy access and worked great. I added 3 more with the plan being to use them for clothes in the future.

I also had to have a paper towel holder. After about an hour of testing with double sided tape, opening and closing I finally found a spot to mount it so the clamshell would close.

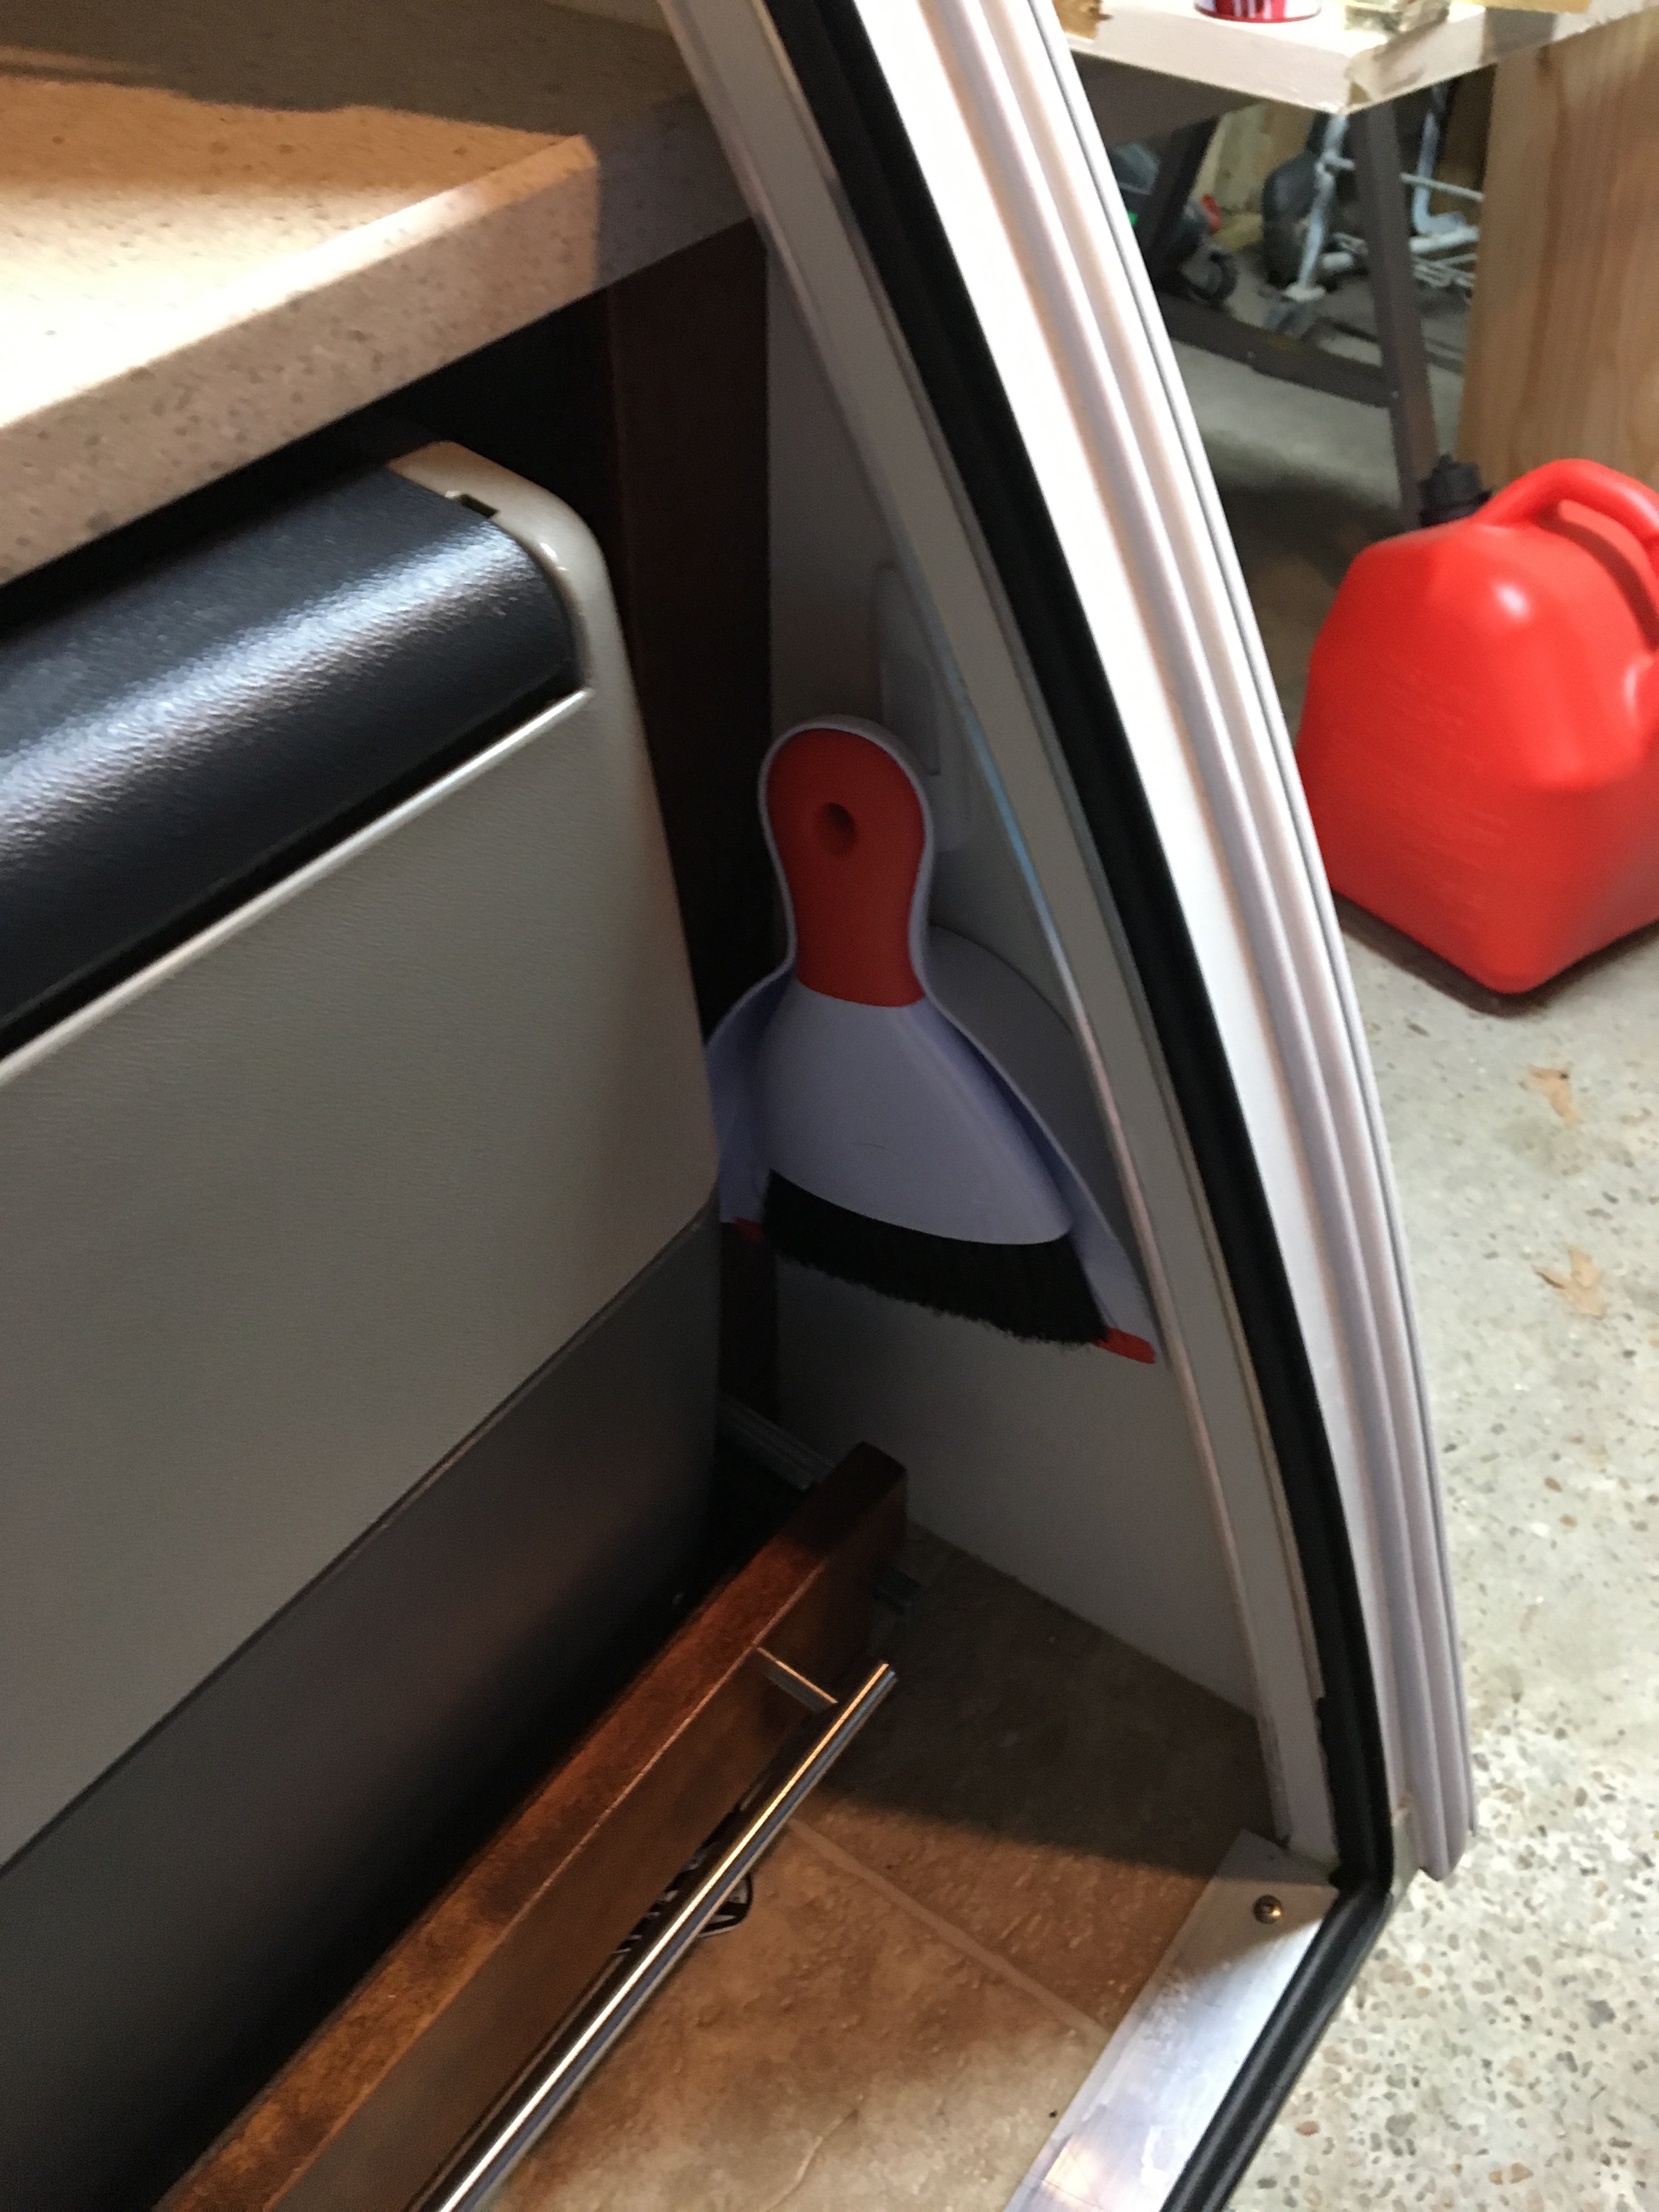
One thing I wished I had was a broom the first time out so I bought a small hand one and found that it fits beside the fridge without hindering it from opening and closing.
The next major issue to tackle was the changing / shower situation. Not long after buying the trailer I had ordered an external, removable shower curtain rod from Amazon, but after 6 weeks of delays it was canceled. I had decided on the pop up changing tent because I couldn’t find one anywhere else.
The tent just had too many issues though. It was very time consuming to set up since it had to be staked down like a regular tent. Even with all the stakes all it took was a little bit of water to make it sag and try to collapse. Packing it up was also a huge hassle. Despite the advertising, it did not “easily” fit back into its carrying case. After fighting with it, standing on it and even laying on it in an attempt to get it folded down, I gave up and shoved in the back of the Escape. I still had to struggle to get it somewhat folded down and get something to put on it so I could see out the windows.

I started looking at what I ordered from Amazon to see how I could build it myself. I thought I could recreate it if I could bend pipe. I talked to our shop foreman at work who offered an idea that would have less moving pieces and probably be more secure than what Amazon was selling. At his suggestion I also used galvanized electrical conduit instead of aluminum pipe for better strength. The weight difference on a 1/2″ pipe over 10 ft was negligible.
His original idea was to mount sleeves on the camper to slide the rod into and hold with a pin. Since there isn’t much behind the fiberglass wall of the camper I was struggling to find something to mount the sleeves with that would be stable. I eventually decided to skip the sleeves and just use 2 pipe clamps mounted on the camper.

The only problem with this idea, as my brother-in-law pointed out was that the metal could damage the outside camper wall sliding it in and out. I decided to wrap the ends like you would a tennis racket, using waterproof, rubber electrical tape.

Once it was mounted it appeared to work well, but I wouldn’t know till I had a chance to try it.

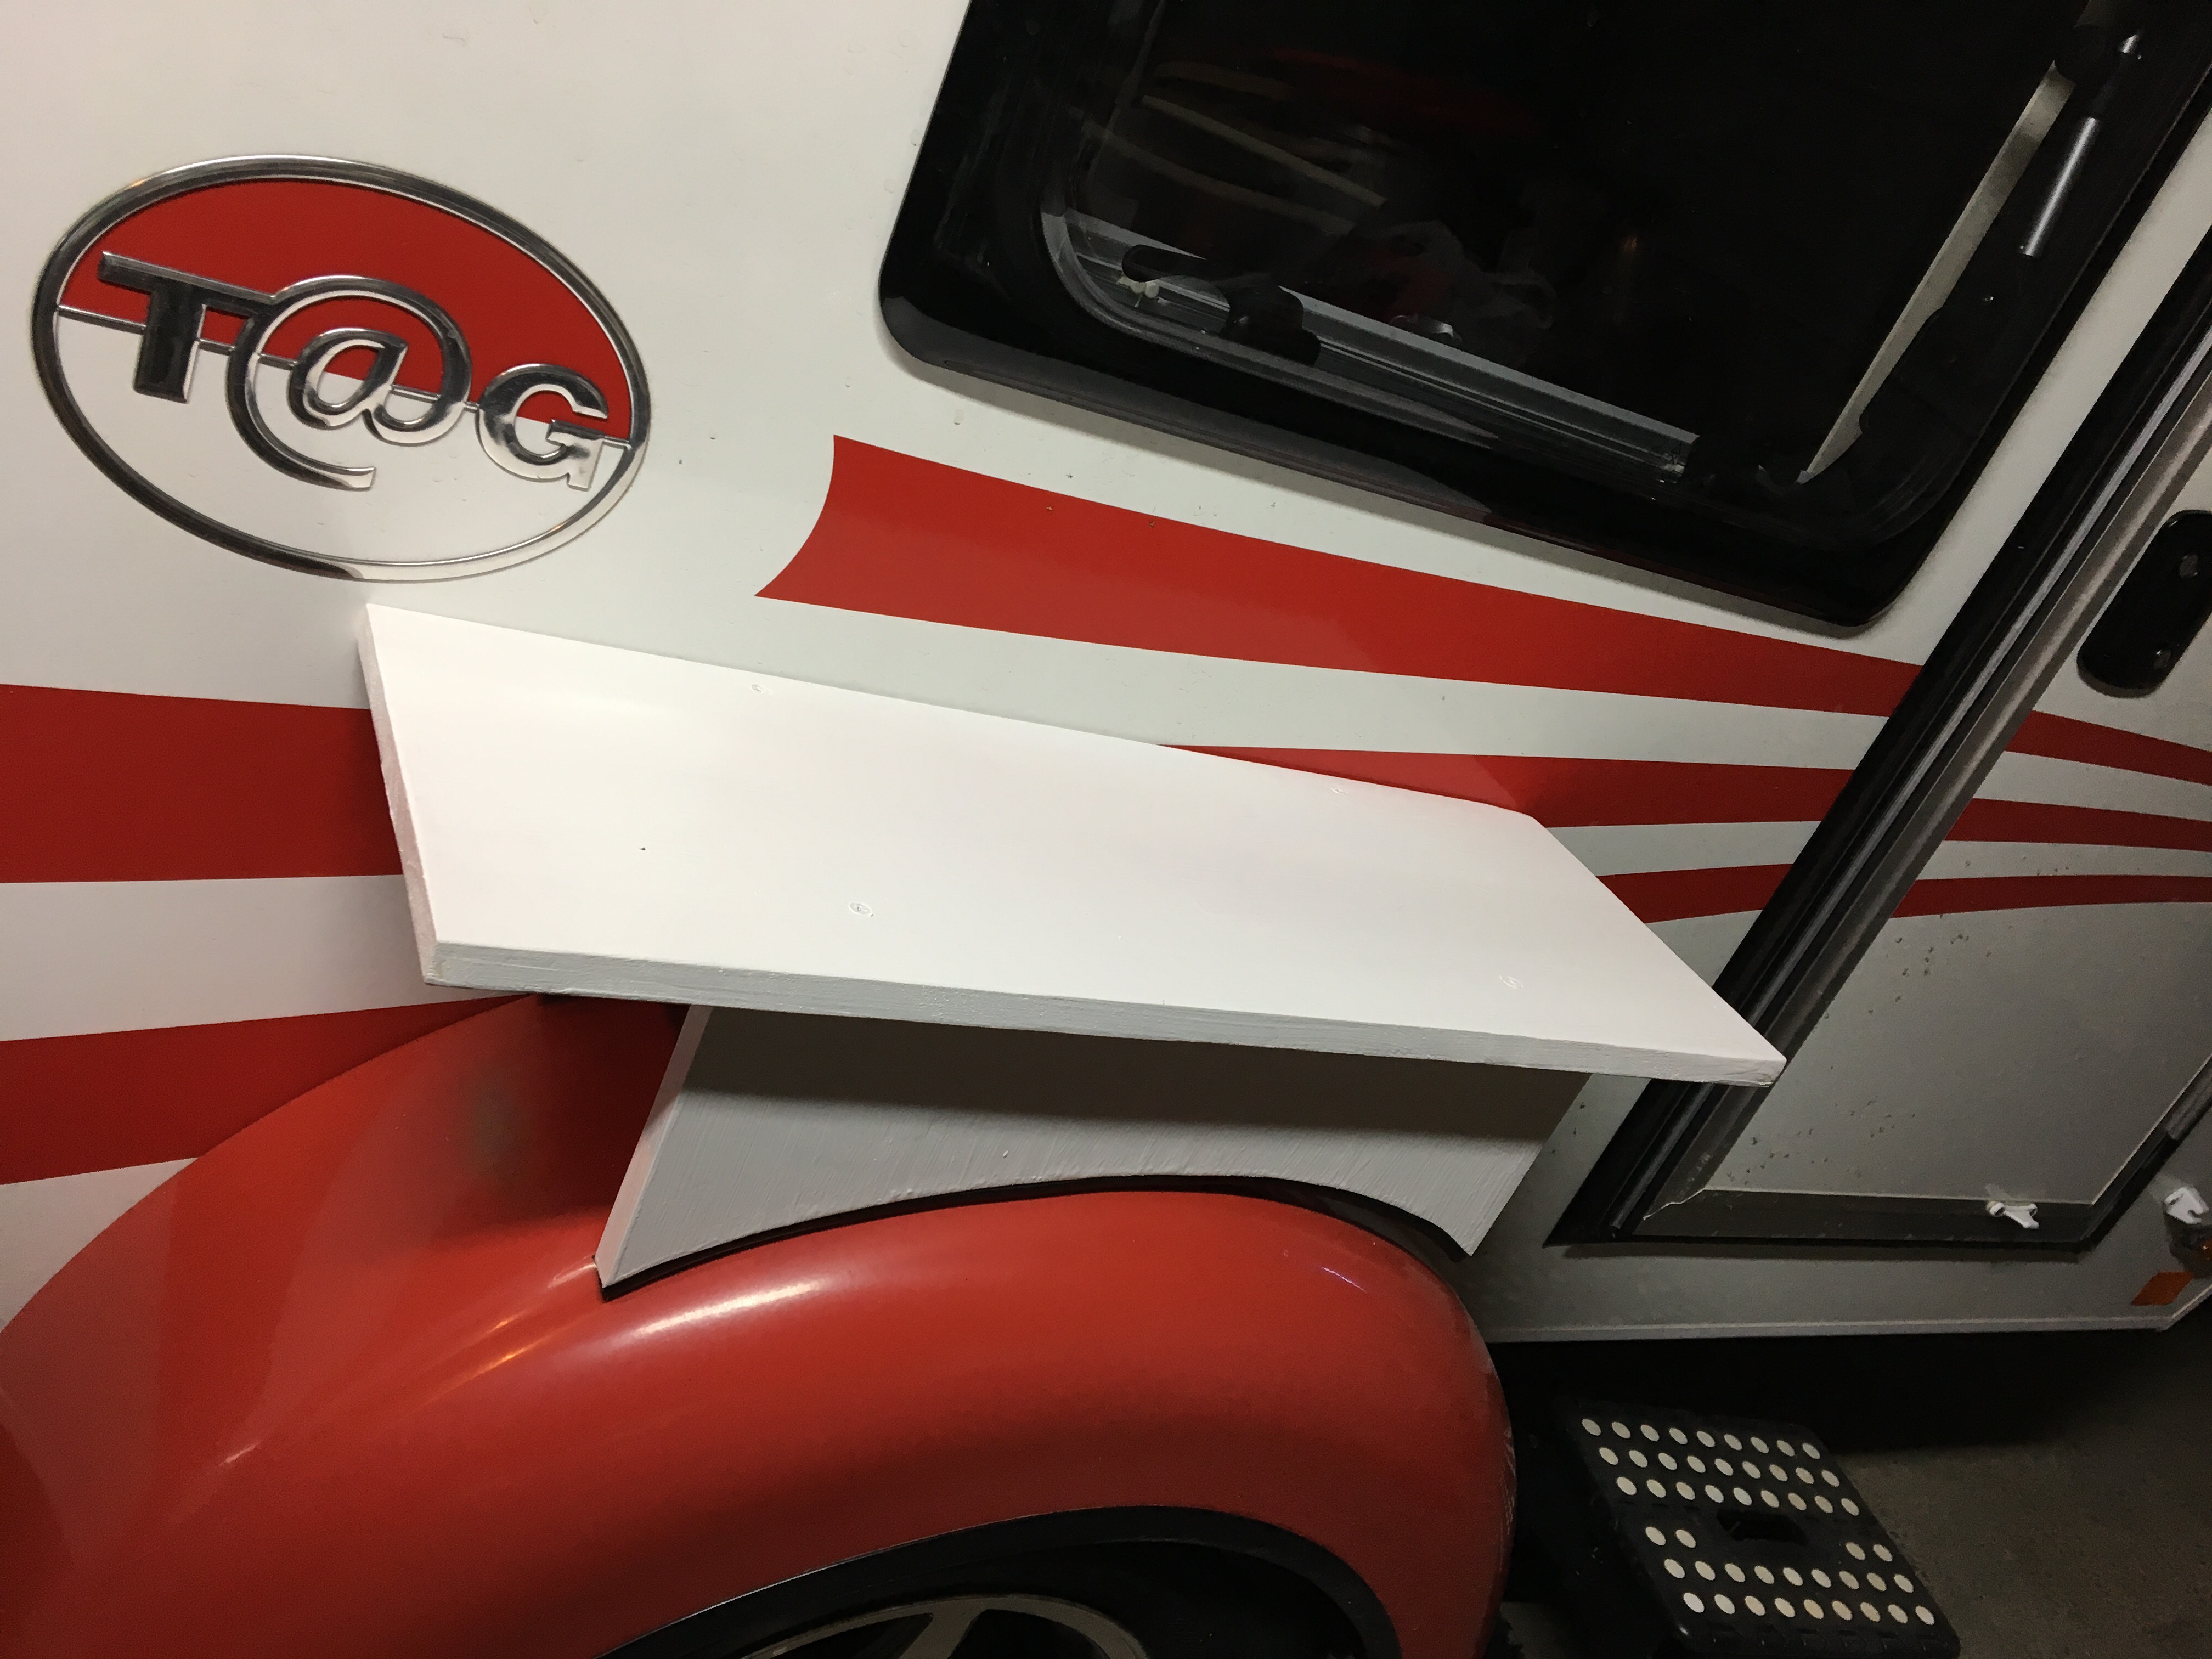
On my first trip I discovered that the T@G regular addition has wasted space with the wheel covers. The Outback edition has a flat top to be used as a table. The rounded one I have is not useful, even though I did try to use it to precariously balance things on it, which ended in candle wax on my pants.
The Monday before heading to the Texas Tiny Trailer rally I decided to try to remedy this issue. Due to the time restraint this is not my best work.
To make a pattern I taped a piece of cardboard to the wheel cover and traced the size of the cover on it. I decide to make the table top just big enough to cover the wheel but not any larger since it would end up unstable and may get knocked off.
I made the legs from the traced cardboard and decided about 2/3 of the length of the table would be enough. I made them about 8″ tall, which in retrospect was too high. I didn’t want the arc of the circle too thin it would brake during cutting. About 4″ really would have been enough.


Due to trying to rush to finish them and not having a lot of experience with the jigsaw, the Round cuts did not turn out great. It was easy enough to make them work however by using a self adhesive, rubber seal for a door frame. It keeps them from rocking and also from scratching the covers.
The only other thing I needed to plan for was mosquitos and in climate weather. Although I had the kitchen functioning well it was also a hassle to put everything away 2-3 times s day to close it, but with no way to keep bugs or other critters out I didn’t have a choice. I was originally looking at the clamshell tent by Paque but upon more research it did not have great reviews for something that costs almost $700. Since I found their visor I bought less than stellar, I was very reluctant to spend that much money on it.
It also didn’t really fit into my ultimate plan for the camper. Something that required tent poles was definitely not going to be a fast and easy set up and tear down. Before I bought anything I spent a good couple weeks looking at options.
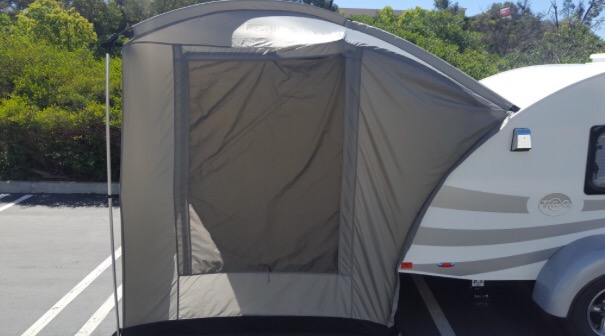
I ended up finding the tail veil on Teardrop shop. I originally didn’t find it because it’s sold as an SUV accessory but there were great reviews from people who had used it on teardrops. It seemed like a great option since it was designed for easy setup, with no tent poles. It would keep mosquitoes out and also had a rainfly to fit over it to keep rain out. It was also only $200, which was a much better price. I decided to try it but did not have a chance to test it before a trip since my garage is too small for it.
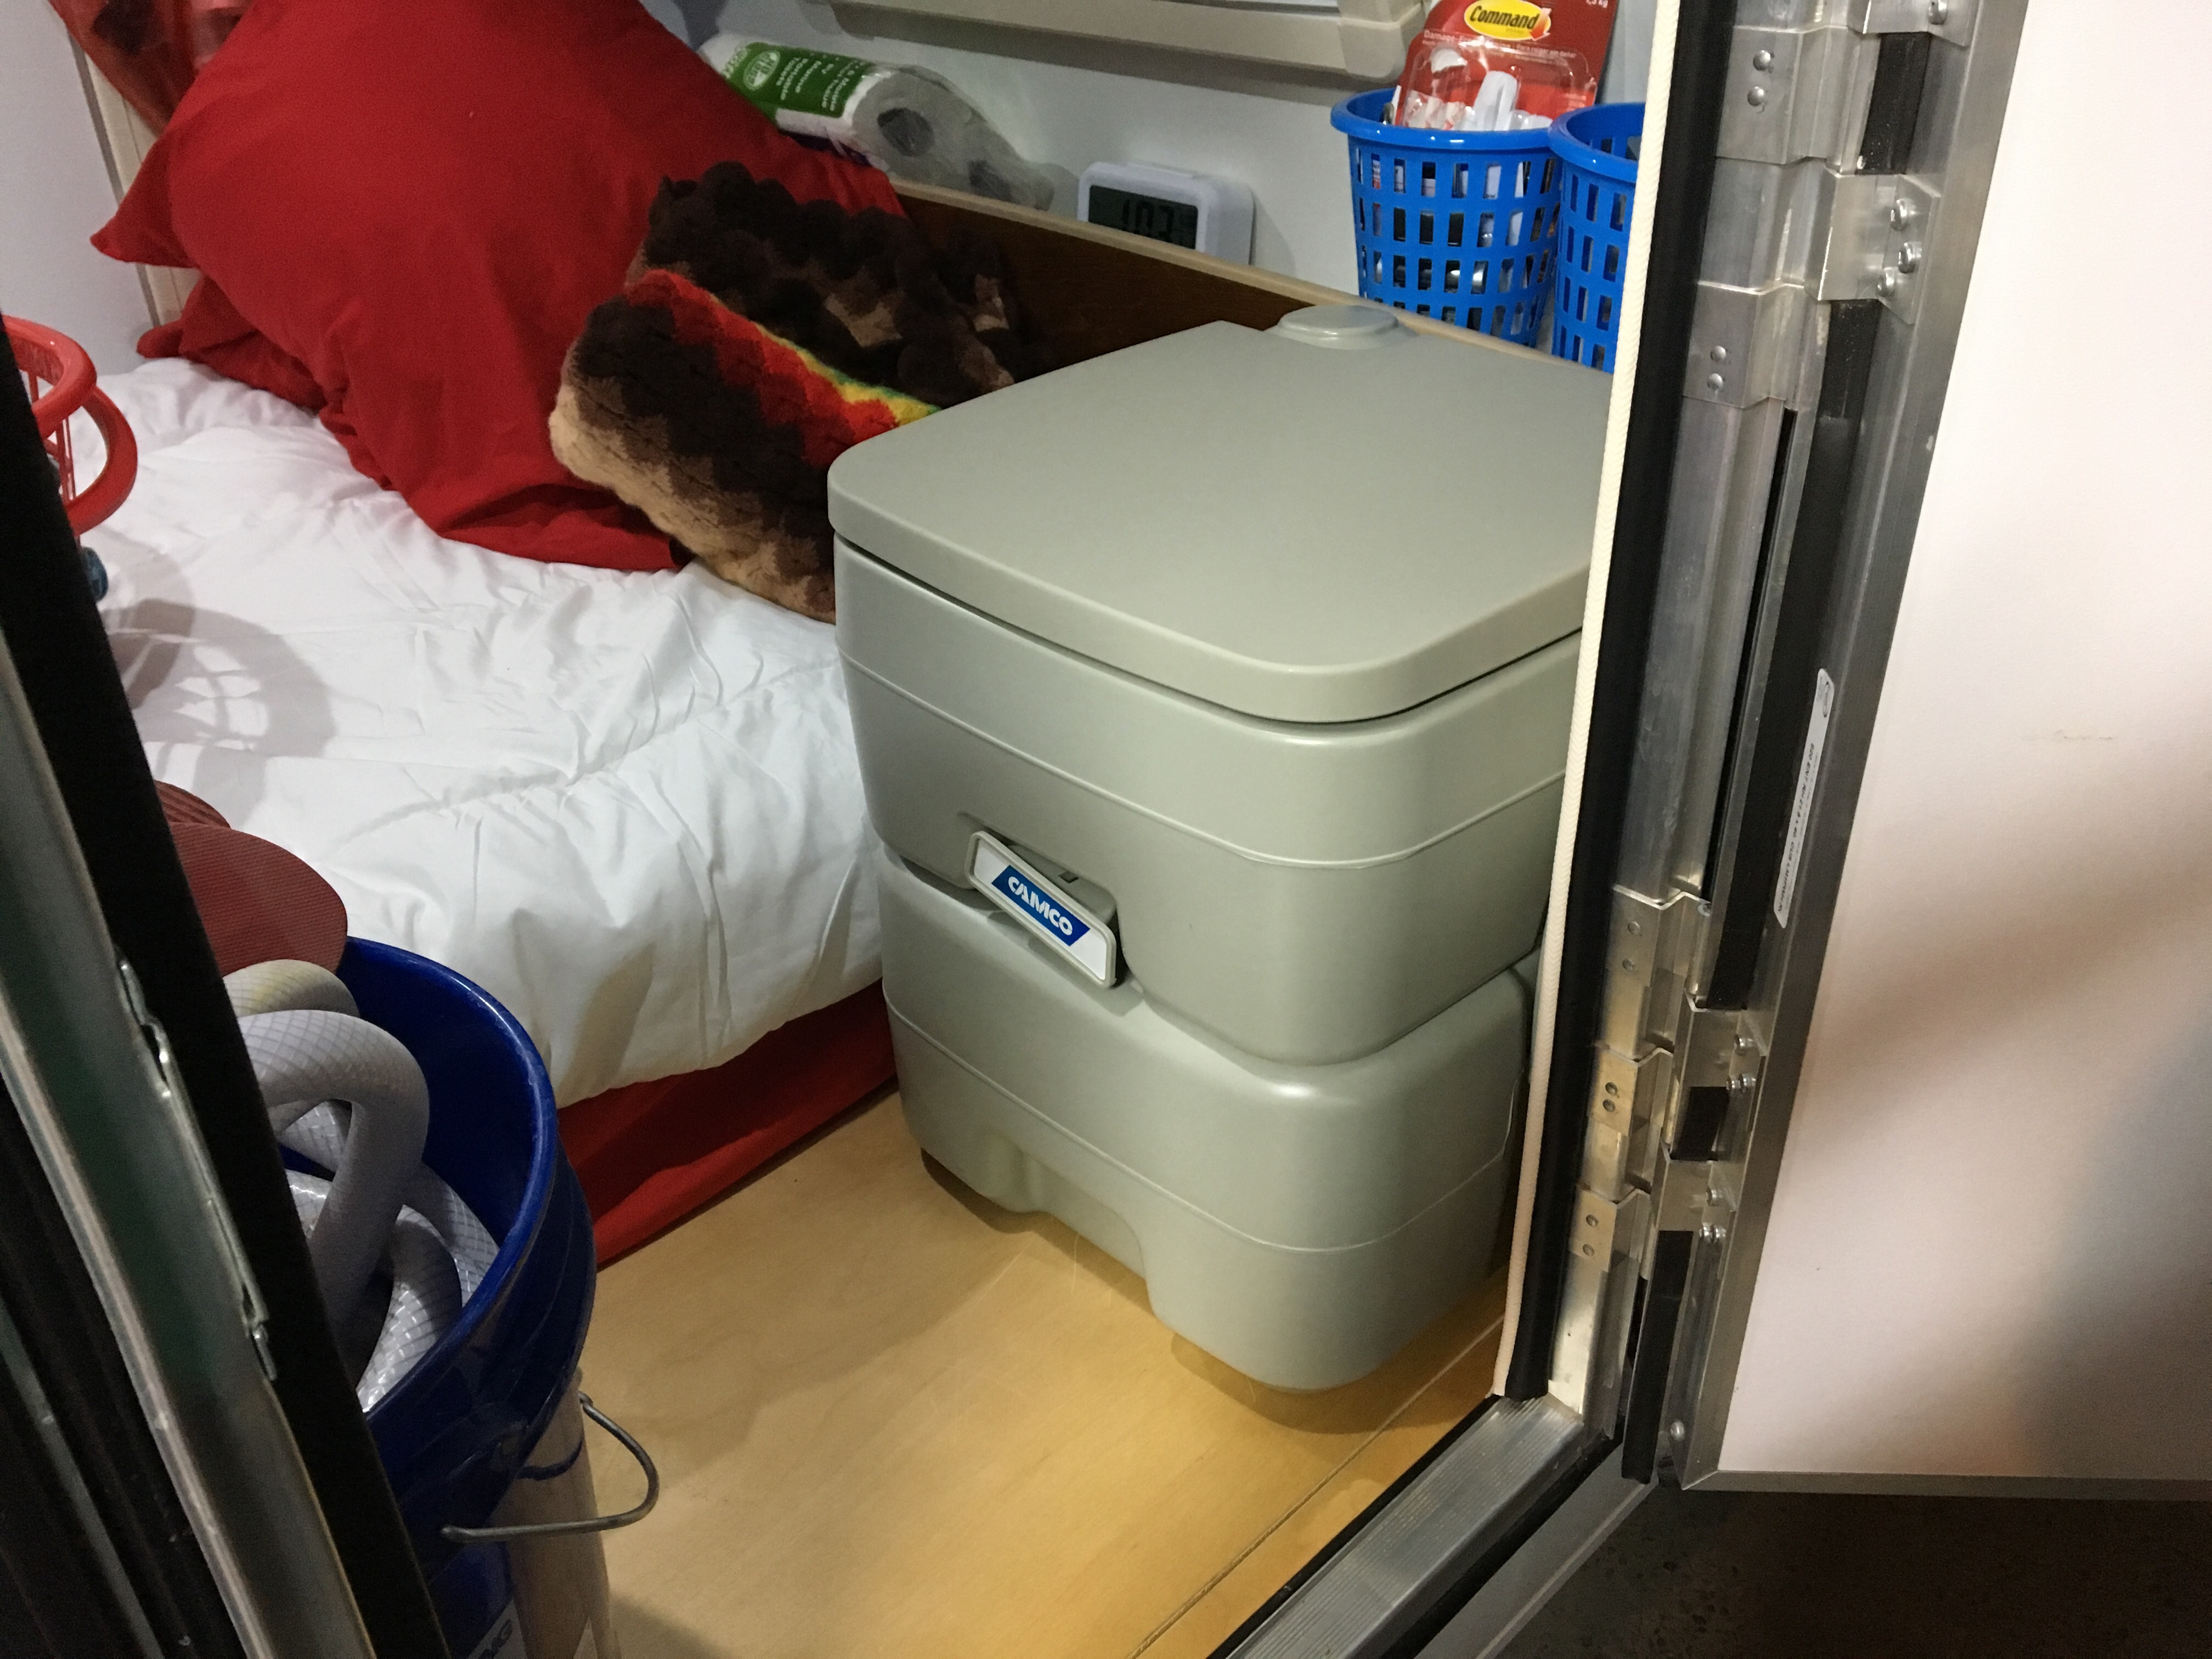
The last thing I did before my second trip was give in and buy a port a potty. I debated on it for weeks because I just didn’t know if it was something I wanted to deal with. I ultimately decided it would be worth it at night because having to drive the restroom in the middle of the night on my first trip was a major hassle. I decided if I was going to buy one it was one thing I was not cheaping out on.
Since we had had one camping growing up I knew the type with separate waste and water tanks that use chemicals are clean and sanitary and if maintained correctly would not stink or attract bugs. I know a lot if people opt for buckets with trash bags and kitty litter but I just come go that route, especially in the Texas summer heat.
The one I bought is the Camco 5.3 gallon one. It’s very lightweight and easy to move. It also turned out to fit in the camper in the space created by the twin bed perfectly. This also gives me an option on roads trips if I end up in the middle of nowhere and need a restroom.